Manage a person
Introduction
As banks face strict legal and regulatory requirements for maintaining complete and up-to-date data on their clients, Akkuro makes it easy for you to maintain and update person details.
In the Client Service Portal, you can update and edit person details anytime you need. The steps below describe how you can update the data of any persons already created in the system.
Update person details
To update a person’s details, you start from the Person 360° page.
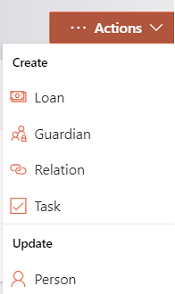
From the Person 360° or Person details page, you click on the ‘Actions’ button in the top right corner and select 'Person'. This will bring you to the same screen as from the ‘Create Person’ process from where you can update the person data.

The same restrictions regarding mandatory fields and validation rules apply as in during the ‘Create Person’ process.
Note: However, unlike the ‘Create Person’ process, during an update of person details, you can change the person Status to ‘deceased’ and fill a 'Deceased date'.
After updating the data and clicking 'Next: Summary', a summary tab with the changes is displayed. On this page you will be able to see the old and new values of all the updated data fields.

Depending on the configuration of the ‘Update Person’ process in the Configuration portal, once the changes are confirmed by you, the changes will either be implemented immediately, or an Approval Task will be created where a second user will need to confirm the changes. More information on the approval tasks can be found under Task management.
Manage person lifecycle
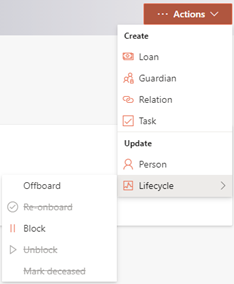
Each person has a status, which can change during the client lifecycle. Changing a client’s status can be done using the Lifecycle function which can be found under Action menu on the person:

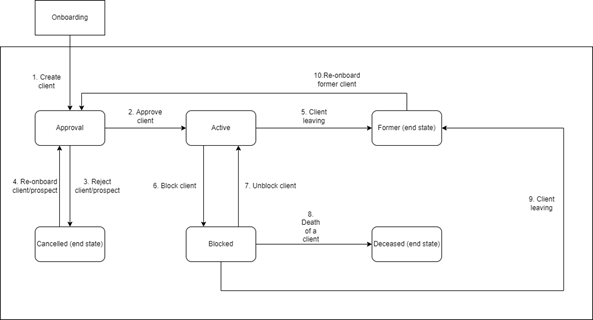
Depending on the persons current state certain status transitions are allowed and others are not. For example, a person that is not blocked cannot be unblocked. Below diagram gives an overview about the allowed state transitions:
Depending on the state transition that you are making, you will either get a popup where you need to confirm the state transition or a popup where you need to select a reason for the state transition.
Depending on the set-up of the ‘Person lifecycle’ process in the Configuration Portal , the transition will either be automatically processed or a task for approval will be generated.

Status and disabled actions
Depending on the person status certain actions will be restricted. In below table you can find which actions are restricted depending on the Person’s state:
| Person status | Restricted action(s) |
|---|---|
| Approval | • Create new loan • Update lifecycle |
| Active | N/A |
| Cancelled | • Create new loan • Create guardian or ‘other’ relation • Create product relation |
| Blocked | • Create new loan |
| Former | • Create new loan • Edit client details • Create guardian or ‘other’ relation • Create product relation |
| Deceased | • Create new loan • Update lifecycle • Edit client details • Create product relation |
Updated 10 days ago